Learn how to convert your Outlook contacts into an Excel-compatible spreadsheet for future import into a different Outlook account or alternative use. Special focus on customizing the contact information you wish to export.
In Outlook, go to the ‘File’ menu and select the ‘Open & Export’ tab on the left. Proceed to ‘Import/Export’.
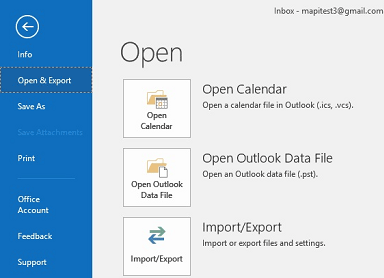
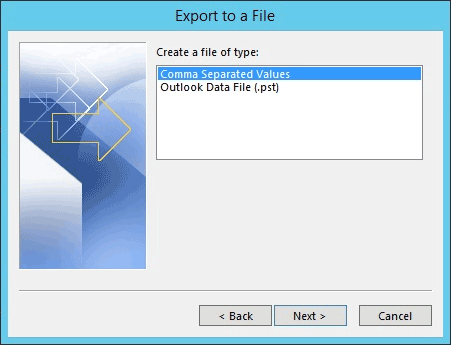
Although the option of exporting your contacts to a .csv-file is not apparent, you will easily find it if you select ‘Export to a file’ in the dialog window.

Few people give it any thought, but CSV stands for ‘Comma Separated Values’. Essentially, this format stores data as plain text, with each value separated from another by a comma (surprise!). For the user’s convenience, Microsoft Office displays such files as Excel spreadsheets by default.
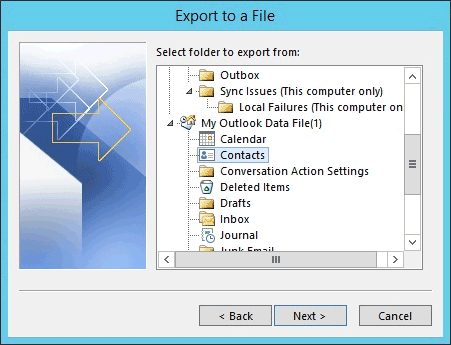
Next, select the folder you would like to export contacts from – the general recommendation is to go for a self-explanatory title unless you’re looking for something specific.
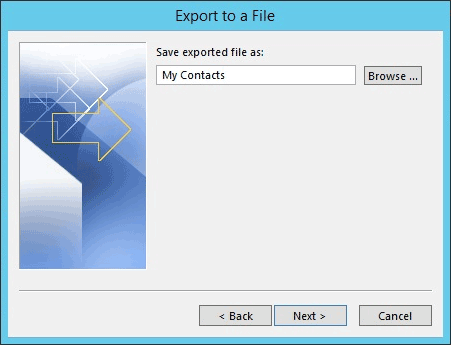
Further on, you will be prompted for the target destination for your .csv-file and a name for it. By default, it will be saved in ‘Documents’.
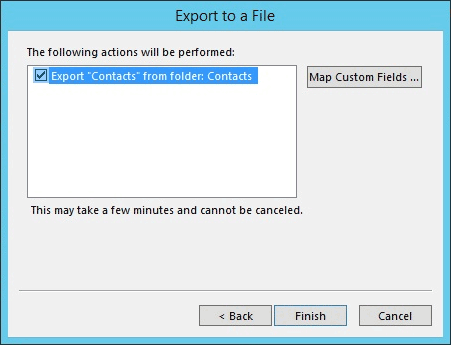
In the last window, you will see a list of actions about to be performed and a button captioned ‘Map Custom Fields’. Now, that does sound a bit obscure, but it is in fact a handy feature that enables you to set up the columns in your future Excel spreadsheet and make sure you avoid exporting data you do not need.
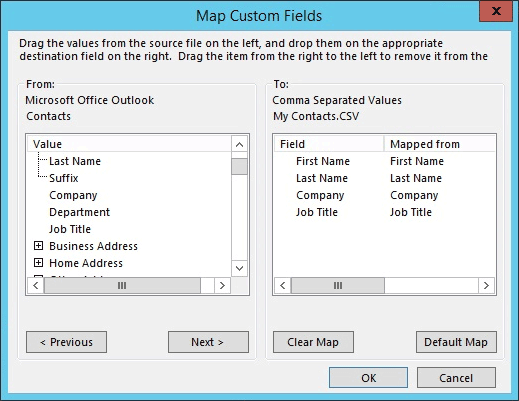
To set up custom fields – that is, columns in your future Excel spreadsheet – you might want to clear the map first. Then you can start dragging and dropping the items that interest you to the right-hand box. If you change your mind during the process and decide to export all the information just in case, click on ‘Default Map’.
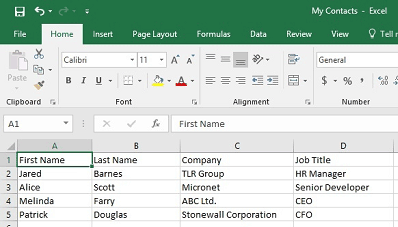
Click ‘OK’, then ‘Finish’, and there you go – after the export is complete, you can view your .csv-file in Excel. As you can see, in this case, we have selected just four items of contact information for export, so we have four columns on the spreadsheet that match the selected fields in the previous screenshot.
If you make any minor changes when viewing the file – like altering the width of columns, for example – it is generally recommended that you refrain from saving such changes, especially if you intend to use the file for future export in a different Outlook account.