Outlook Add-ins management – introduction
For an impressively long time, the Microsoft Office suit has been the benchmark in productivity software for its versatility, popularity, practicality, and sheer number of features – so many that its reign as the de-facto standard of about two decades does not seem to be under threat at all.
But even the broadest list of features can leave specialized users desiring for more.
Since the inception of its renowned suite, Microsoft has been working on addressing such niches – leading to the addition
of so-called “add-ins” (also known as “add-ons”, “plug-ins”, and other variations of the word).
In the days of Office 2000, certain layers of programming interfaces were introduced. Their purpose was to allow third-party developers to include features of their own into Office applications. The name of the actual interface is known as MAPI (or Messaging Application Programming Interface), which has been the core of the COM Add-ins system available throughout the modern Microsoft Office history, including the latest installments (Microsoft Office 2016).
This timely decision led to the emergence of a whole new software market segment of third-party add-ins. Since this parallel market has existed basically as long as the actual platform (Microsoft Office), quickly expanding alongside it, these developers have over time created innumerable add-ins, each one adding one or more functions or features to the already feature-rich applications of Microsoft Office.
The effect of that decision to create MAPI is hard to over-estimate, and today for nearly everyone who truly depends on Microsoft Office, there is a handy add-in that can save time or improve productivity significantly.
However – since these additional features do not add themselves, not every person working with Office may know how to use, install or manage them inside their Office applications, or even that they exist at all!
The basics about managing COM Add-ins in Microsoft Office
Structurally, COM Add-ins can be compared to regular Windows programs. They, too, have some installable components (program files), and they also can be registered as a program – along with the addition of new icons, shortcuts and segments of the interface.
Continuing this analogy, just like their Windows executable counterparts, COM Add-ins can be:
- Installed
- Updated with new functionality
- Uninstalled
In addition to that – being what they are in terms of their platform-dependent nature – they could also be:
- Disabled, or
- Enabled again,
by using the controls available in their parent platform (namely a Microsoft Office application, such as Outlook or Word).
In the next section of this article, we will use Microsoft Outlook 2013 as an example, and will take a closer look at the lifecycle of a single add-in on an individual employee’s computer, from start to finish.
Installing a COM Add-in
Like every third-party software (in contrast to out-of-the-box pre-installed Windows applications), Office add-ins need to be installed. Basically, software installation consists of copying certain files to your computer and registering it within the system (whether Windows, Office, or both).
Nowadays, the vast majority of software vendors offer their products in the form of self-installing setup files, familiar to most Windows users:
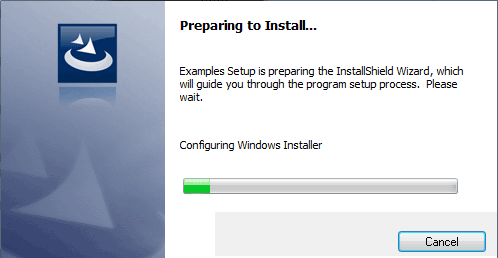
This install procedure – in no different from any other regular software installation with the exception of user interface and contextual content – is the process where required files are copied to your computer and then registered.
A very important note has to be made. A running instance of an Office application usually loads add-ins at start-up. Therefore, it is strongly recommended to close all involved Office applications when installing and reinstalling. Otherwise, an add-in might not be registered or unregistered properly, and additional work might be required to mitigate the situation.
In rare cases, a vendor also allows a type of installation where a Windows setup is not used, but we will talk more about this later.
Managing COM Add-ins in Outlook
After the add-in is installed in an Office application (Outlook 2013 in our case, but these instructions are also applicable to Outlook 2010 and 2016), it is time to open up the application and start using the add-in!
From this moment, the add-in becomes a part of the Office application, integrating a certain feature to the main interface seamlessly.
But what if you decide to turn-off the function, or, on the contrary, turn it on after some problem with the add-in, without resorting to uninstalling and reinstalling it again?
Microsoft has provided a convenient way to achieve that. Simply navigate to File > Options > Add-Ins to access the add-in management window seen below:
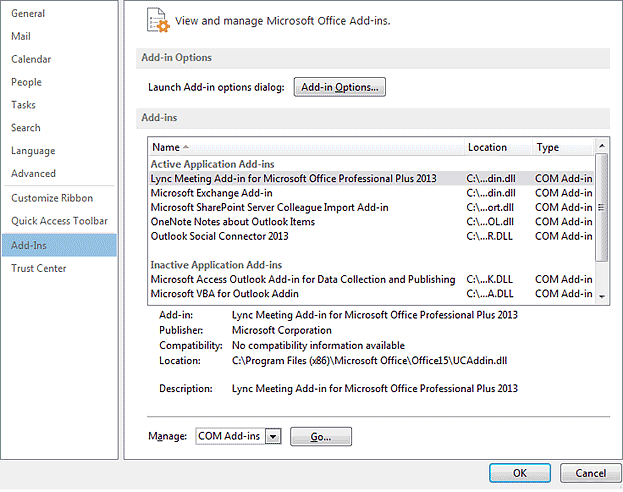
Within this handy command center, you can find all the information about your add-ins, such as their location on the Hard Drive, vendor name, and other useful info, as well as the controls necessary to manage the add-in’s presence inside your Outlook.
Let’s look at the management part more closely.
Simply clicking the “Go…” button (notice the section name – “COM Add-ins” – is visible to the left of the button – we will get back to it in a minute) will show you the list of all the add-ins currently available in Outlook:
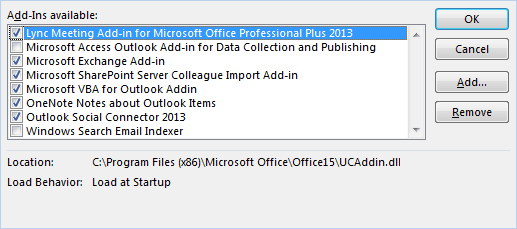
In this list, you can deactivate or activate your add-ins, effectively removing or including their Outlook function – simply click the checkbox and then the “Ok” button. Please note that in some cases you might need to restart Outlook in order for the changes to take effect.
The two buttons – “Add…” and “Remove” are used in case a vendor chooses to replace the regular Windows Setup installation type with a manual one. Please note that this type of installation is seldom-used, and – unless specifically instructed by vendor – try to refrain from using it to manage modern third-party add-ins, most of which would not react properly to such treatment in any case.
Another point of interest is the “Disabled Items” list, where an add-in would end up if something goes wrong with its operation – a sudden Outlook crash, for example, in which case Outlook 2013 will display a warning during the next Outlook start-up, prompting you to continue loading the add-in or to disable it.
In order to manually access the “Disabled Items” list, return to the management window, but instead of clicking the “Go…” button right away – click on the “COM Add-ins” first to expand the menu, and then select “Disabled Items”. The end result should look like this:
![]()
Now, clicking the “Go…” button will open the “Disabled Items” window, where you can locate all disabled components available:
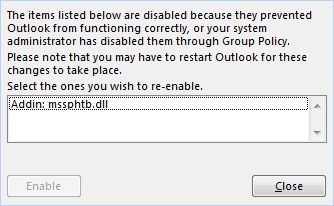
Here you can enable them once again, restoring the add-in’s operation. The importance of this step is hard to overstate, because if the add-in was disabled by natural causes – the user will not be able to activate it in the “COM Add-ins” section without enabling it first in “Disabled Items”.
This design feature also means that in order to restart some add-ins, user might need to actually deactivate one manually – in order for it to end up in the “Disabled Items” list, only to enable its .dll component there and then to be able to activate it in “COM Add-ins” normally. As awkward as it may seem – this practice is the best way to ensure proper add-in activation.
Uninstalling a COM Add-in
When you decide that the add-in has to be removed from Outlook completely, in most cases you can do so using the same universal Windows third-party software approach as when installing it.
Some vendors include the uninstallation option in the same setup file that is used to install the add-in, but the most straight-forward way to achieve the task is to open up the standard Windows Uninstall a program / Programs and Features / Apps & Features Control Panel item –probably familiar to most Windows users as well:
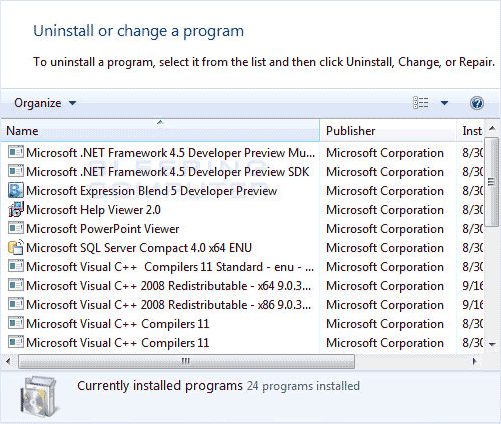
There is not much to say about this essentially generic procedure, but one important note: much like you would do during install, Office applications have to be closed when uninstalling COM Add-ins!
Naturally, there are more ways to install, uninstall and manage Office add-ins due to differences in their programming design, philosophy, and vendor-specific distribution approach. But in essence, such add-ins are no different than any third-party software programs, which all come from the same digital world of ones and zeros.
The world where anything is possible!


Hi, what commands can we use to silently install the add-in?
Hello, this article explains how to deploy the add-in to multiple computers:
https://www.mapilab.com/blog/deploy-software-to-multiple-workstations/
Hi, I’m having trouble trying to find where to input my license code. I bought one for the Mail Merge toolkit and I cannot find any instructions online how to do it. I uninstalled and reinstalled the toolkit and put the license code into the install wizard in Microsoft Word, but it doesn’t let me press next, I can only cancel. It says “Thank you for registering Mail Merge Toolkit!”, but then it does not let me press ‘Finish’.
I also requested a password reset email twice and it hasn’t arrived in more than 15 hours. As a result I can’t see if my support ticket has been answered, so I am posting here.
Please help me, I really find this tool useful, but I can’t justify my payment if I’m not getting the service.
Hello, thank you for your question. Sometimes standard/limited OS users experience this issue. Please run Word as Administrator and enter your code that way:
in the search field in Windows Start, type: winword.exe
– and once Word appears in the list, right-click on it and select “Run as Administrator”, then proceed with the Mail Merge Process – and in the last step, please click add-in option and test selection of different options.
And enter your license code – use the “Registration”/”Change reg.code” option in the Mail Merge Toolkit dialogue at “General”. Or, find it in the drop-down menu available next to the “Merge & Send” button at the “Mailings” ribbon: click on the down-pointing arrow under the question mark icon (Help).
(If you try sending your messages that way – you will most probably get an error stating issues with running Outlook, because mail profile is not configured for Administrator).