Managing two Outlook accounts at the same time can be tricky – especially, if you need to be careful about what account you send new messages from. Thanks to Message Autofill tool, which is included in MAPILab Toolbox, you can create rules for an automatic choice of account based on the folder you are working with. No more awkward mix-ups and a better work-life balance!
As modern work environment is getting less and less attached to offices and corporate facilities, a lot of employees perform their business tasks from home computers and personal laptops, on part-time or even full-time basis. If you use a single email client for both personal and private correspondence, it is obviously easier to look for messages, sort and archive them. In this case, letters are stored in the same PST file, but in different folders.
However, managing two Outlook accounts at the same time can be tricky – especially, if you need to be careful about what account you send messages from. Thus, if you are writing to your colleagues or your boss, you might want to use your corporate mailbox, but on home computers it is quite common to set personal accounts as default, which means that you have to remember to change (or check) the Sender field manually every time before hitting ‘Send.’
Naturally, the abovementioned issue refers only to new messages, as replies are invariably sent from the recipient’s address – and the same goes for messages you forward.
In this article we will describe how you can make your Outlook choose account for new messages automatically according to the folder you are viewing at the moment. The tool that can help you is called Message Autofill; it is a considerably extended and enhanced version of Outlook’s built-in autofill functionality.
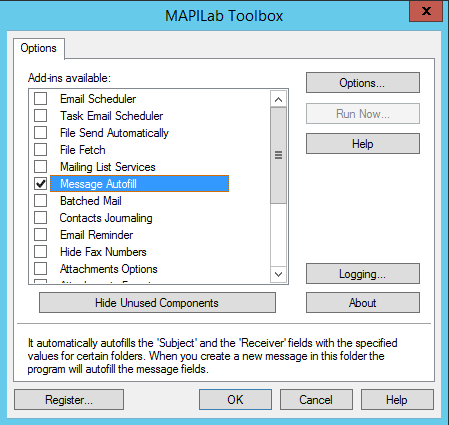
Message Autofill is delivered as part of MAPILab Toolbox, a set of Outlook add-ins by MAPILab. These tools were carefully selected to respond to Outlook users’ daily needs which have not been covered by standard Outlook possibilities. After you install this easy-to-use set of tools (available as a trial version, of course), you will find its Options under MAPILab tab on the Ribbon.
To start working with the component, activate it by checking ‘Message Autofill’ in Toolbox Options and continue to component options.
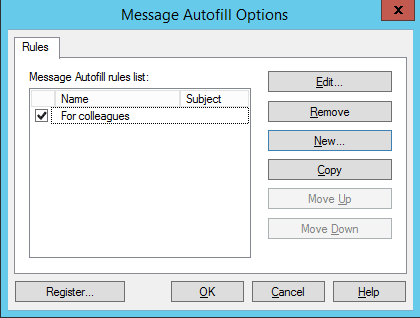
The component functions as a set of rules, which gives a lot of flexibility – and a well-integrated interface.
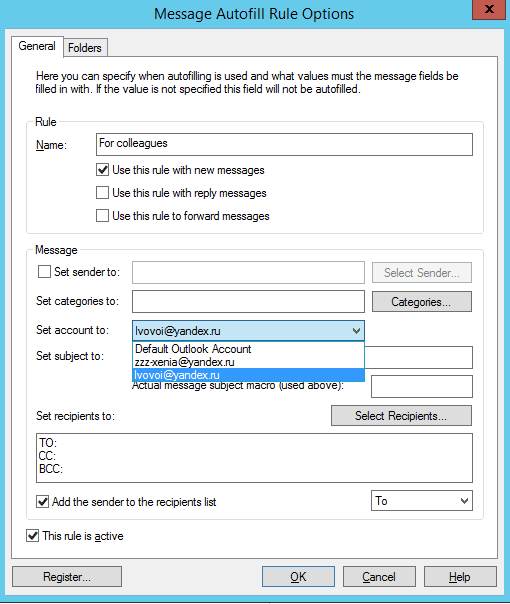
The New Rule window has two tabs: General and Folders. Under General, you can specify the account you prefer to use, add recipients or senders and choose what kind of messages the rule will apply to.
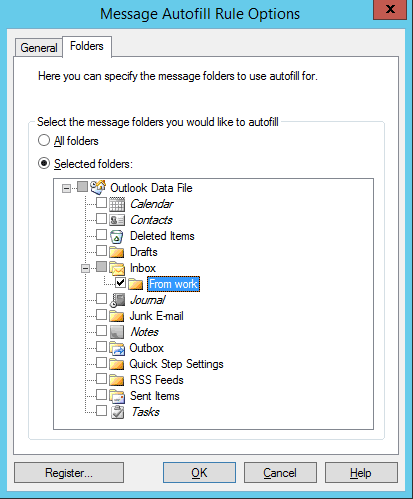
Under Folders, you can choose one or a group of folders under your corporate account.
Besides, Message Autofill has a couple more useful features, like forwarding or sending a copy of a message to chosen recipients, which is great if you work under supervision and need to keep your supervisor on top of things.
For a better explanation, let us take a look at a simple usage scenario. In your corporate Inbox, you have a subfolder named Project X, where you put all the correspondence you’ve had with partners and potential customers about this project. As you browse through the folder, you have an idea of contacting a new partner you’ve met at a business fair and telling him about the project. The rule you’ve set up for the Project X folder provides for an automatic choice of your corporate address, indicates Project X as message subject, plus, sends a copy of your message to your boss and another one to sales team. Thus, all you need to do is enter the recipient’s address.
Taking your mind off technical details, Message Autofill and other Toolbox tools will help you make the most of your Outlook and concentrate on a creative approach to your daily tasks.