Are you using the features of the SharePoint Intranet platform in your everyday work? Do you use SharePoint lists at your organization’s corporate SharePoint Server site? And when you send numerous e-mail messages using the mass mailing tools like Microsoft Office Mail Merge – do you wish to use your SharePoint lists as recipient base directly, without exporting them to your local drive?
It is possible now: the new feature is added to our top product Mail Merge Toolkit for Outlook exactly for your convenience!
Now, you can start your normal Mail Merge task in a document (or a publication), and connect directly to a shared SharePoint list at your corporate SharePoint site from your Word document or Publisher publication.
The steps are very similar to the steps of Mail Merge and Mail Merge Toolkit:
First, I’m starting with my document template and make sure Mail Merge Toolkit is active in my Word and ready for my use.

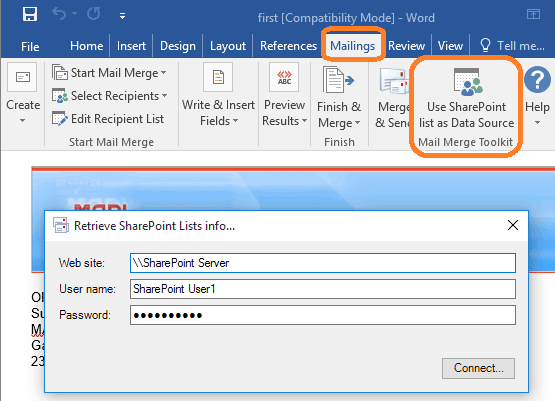
Connecting document to the SharePoint list
In the 3rd step of Mail Merge Step by Step Wizard, we are offered to connect to the data source.
And here, I am clicking on the Mail Merge Toolkit option “Use SharePoint list as Data Source”. In the dialogue window here, I need to type the address of my corporate SharePoint site, my login and password.
Personalizing document text
Once the e-mail recipient base for my mailing is connected, I can start adding individual fields from my data source. I can use here the “More Items” option from the Wizard.
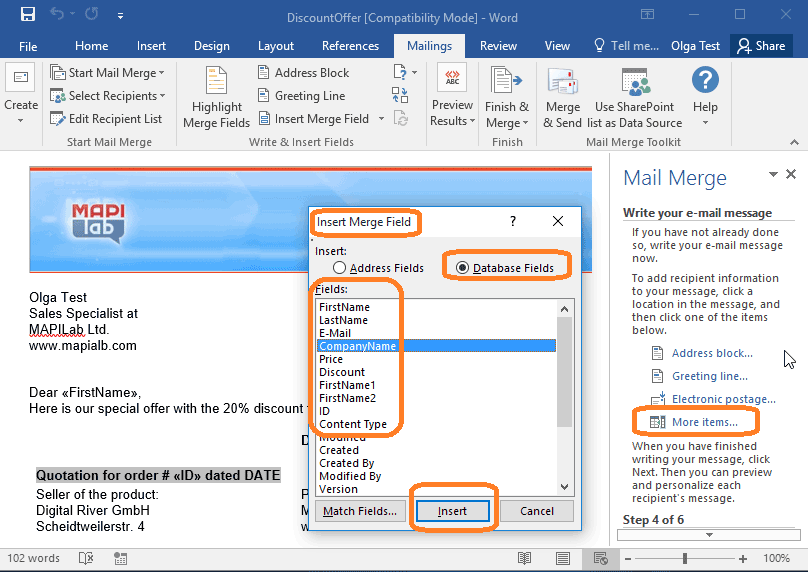
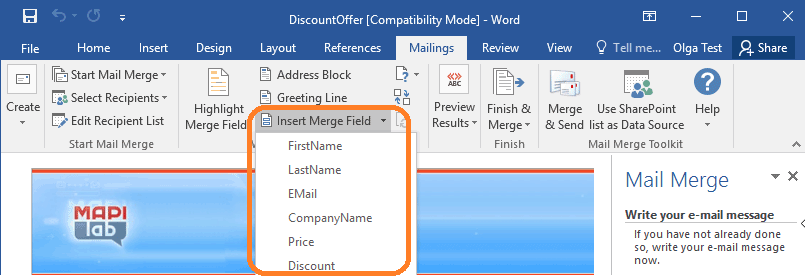
Or the ribbon option “Insert Merge Field” can be used here as well to insert the data fields from my SharePoint list.
In the 5th step of the Wizard, I can checking the resulting outlook of my personalized documents (the ‘Preview Results’ ribbon option will do the same).
Sending with Mail Merge Toolkit
After clicking on “Merge & Send” in the ribbon (or on “Mail Merge Toolkit” in the right panel), I am getting the dialogue window to complete my mailing. In the “To” field, the e-mail address field should be selected. But I can personalize Subject line as well: my recipient’s company name can be selected from the SharePoint list.
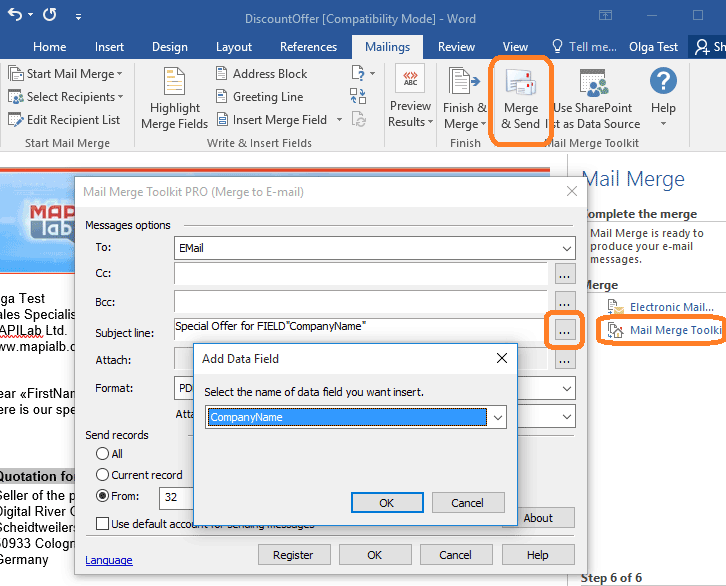
The format of my mail is “PDF attachment” – and the recipient will get an individual PDF document attached to the e-mail message and ready for printing it. The name of that file is unique too: I am selecting the data source field to be used as the Attachment name.
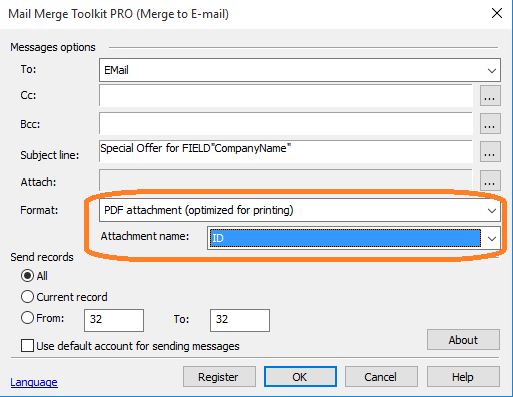
HTML and Plain Text message format, as well as RTF attachments are supported too.
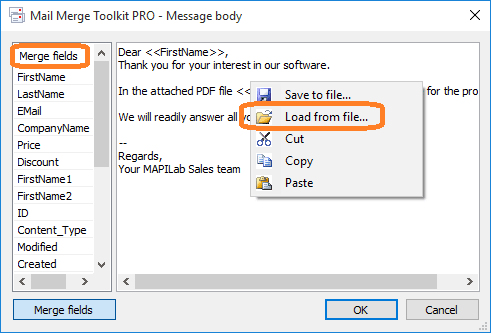
My next step is writing the message body text: in this dialogue window, I can also use data source fields.
By the way, in this window, I can import message text from a RTF template-file, or even save my text as the template for further mailings: right-click mouse in an empty place in the edit field to call the context menu options. Pasting text with images is supported as well.
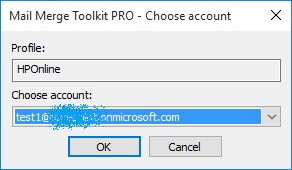
And at the last step of performing mailing with Mail Merge Toolkit I get the Outlook account selection dialogue – the add-in supports sending from all Outlook accounts.
Messages appear in Outlook Outbox, then go out and appear in my Sent Items.
Actual updates of the SharePoint list
I can save changes in my template file, together with the SharePoint list connected to it – and use it for further mailings. When I open my Word document next time, the Mail Merge system reminds me to connect to my previously used data source.
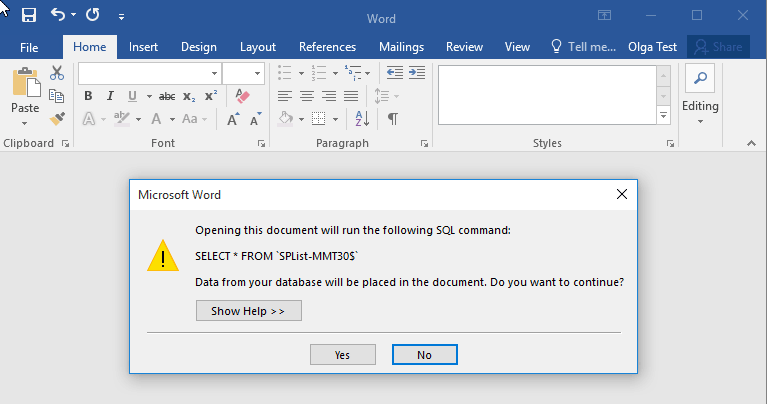
The SharePoint lists we use can be updated by our staff, so the recipients in it may differ frim the ones I selected previously. And once I confirm the connection – Mail Merge Toolkit is checking for the updates of the list and loading the most recent version as my recipient base.
So, with the new feature of our Mail Merge Toolkit add-in for Microsoft Office Word, Publisher and Outlook, you can connect to the SharePoint lists at your corporate SharePoint Server site, and send your mail directly to your contacts saved there. And the tool will load the most recent and actual version of your contact base from your SharePoint Server, just with a single click!


Hi. As new update has been Arrived and when I have installed new version and its registered. When I am trying to send email nothing happening. Please help
Hello. In order to resolve the issue – please perform a complete reinstallation of the latest version of Mail Merge Toolkit exactly as follows:
1) Close Outlook and Word (all instances) – then, open Task Manager and check that both outlook.exe and winword.exe are not listed under “Processes” tab. If they are – please terminate these processes, or simply log off and log on.
2) Uninstall current version from your computer through the menu “Start-> Settings-> System-> Apps & Features”.
3) Check whether program folder no longer exists under the following path: C:\Program Files\MAPILab Ltd\ (“Program Files (x86)” if you have 32-bit Office on 64-bit machine)
If it does – remove this folder manually;
4) Please download the latest version of the add-in: https://www.mapilab.com/outlook/mail_merge/
5) Unzip the package, double-click the setup file relevant to your bit-edition of Office (it could be either 32-bit or 64-bit), type in the administrator’s password, if necessary, and install the software “Only for me (Current user)” during the third step of Installation Wizard.
6) Launch Word and follow all First Start Wizard’s directions.